

Fail Beginner-friendly 1–3 hours, plus a day of waiting

Your laminate is peaking at the seams

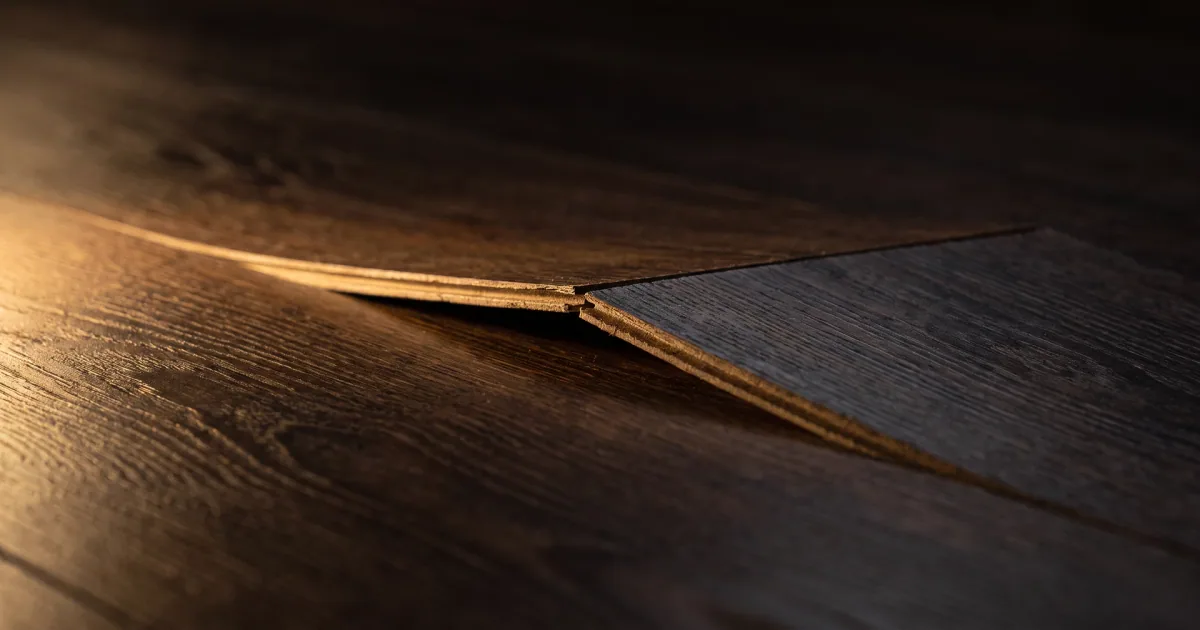
A ridge at a seam means two planks are pushing into each other. The floor is almost always pinched somewhere else, and the only direction left is up.

What it looks like

Before and after, in one diagram.

Drag the gold divider, or use the slider underneath. The left side is the fail; the right side is what you are aiming for.

What it sounds like: You run a hand over the seam and it clicks, and from standing height it looks like a tiny tent pitched in the middle of the floor.

What went wrong

A ridge at a seam is not cosmetic. Two plank edges have been forced into each other and the locking profile has nowhere to go but up. On a floating floor the whole surface behaves like one sheet, so a pinch at one wall can show up ten feet away as a tent in the middle of the room.

The ridge is a symptom, not the disease. Find the pressure and you usually find the fix. But once the locking edge is crushed, no amount of pushing will make it seat again.

Why it happened

Four suspects, cheapest first.

The floor is tight to a wall. Laminate needs a gap at every vertical surface: walls, door frames, pipe collars, hearths, cabinet legs. Makers usually print the number on the carton, commonly around 3/8 in (10 mm), but the carton wins over anything you read online. Butted to the drywall, the first humid week pushes the planks together and the seam lifts.

Something is pinning the floor. A door casing sitting on the planks, a threshold screwed through the floor, a cabinet installed on a floating floor, or a nail driven through the baseboard into a plank edge. Floating means floating. Anything that fixes the surface to the building takes away the room it needs.

The core has taken on water. A spill that sat, a wet mop used weekly, a slab with no vapour barrier, a dishwasher leak nobody noticed. Swollen laminate does not return to its original thickness. If the ridge feels soft or the seam looks darker, deal with the moisture first.

The subfloor is not flat enough. A hump under the middle of a run lifts a seam as effectively as a tight wall. A straightedge laid across the floor will rock or show daylight. Most makers specify a flatness tolerance, so check the carton, then check the floor before you blame the planks.

Press the ridge with the flat of your hand. If it moves down and springs back, you are fighting pressure. If it is hard, or the planks around it feel swollen, suspect moisture. The trim line agrees: baseboard tight with no gap and a peak on the same wall means you have your answer.

When to stop and call someone

Stop if the ridge is wet, if the floor is over a slab with no vapour barrier, if the planks are glued down, or if the peak returns within a week of relieving the gap. A returning peak means the floor is moving for a reason you have not found, and cutting more off the ends will not fix it. Stop too if the planks are discontinued and you cannot match the run.

The fix, in order

Do these in this order.

Fixed
  1. Find the pinch

    Walk the perimeter with a torch and a coin. Check baseboard, shoe moulding, door casings, pipe collars and cabinet toe-kicks: anywhere the planks touch a fixed object is a suspect. If the coin will not slide under the trim, the floor is tight.

    20 minutes
  2. Open the wall gap

    Pull the baseboard and shoe moulding on the wall nearest the peak. If the plank ends are tight to the drywall, cut them back with an oscillating multi-tool, blade flat against the wall. Vacuum the dust as you go.

    45 minutes
  3. Give it 24 hours

    A pinched floor often relaxes once the pressure is gone. If the ridge drops, you found the cause. If it is still proud after a day, the locking profile is deformed and those planks need to come out.

    24 hours
  4. Replace the damaged planks

    Work from the nearest wall, not the middle of the room. Unzip the row to the damaged pair, check the edges for crushing, then fit new planks in the same run and tap them home with a block.

    1–2 hours
  5. Rebuild the trim with room to move

    Reinstall baseboard by nailing it to the wall, not through the floor. The gap stays covered but empty. Do not fill it with caulk, foam or grout; it is there to let the floor move.

    30 minutes

Before you start

Tools and supplies.

Tools

  • Oscillating multi-tool with a flush-cut blade
  • Pry bar
  • Tapping block
  • Pull bar
  • Utility knife
  • Moisture meter (borrow one if you can)
  • Knee pads

Supplies

  • Replacement planks from the same run, if you can find them
  • Matching baseboard and shoe moulding
  • Painter's tape
  • Spacers

Buy the replacement planks before you cut anything. Matching a discontinued run is the hard part, not the labour.

Next time

How to prevent it.

01

Measure the gap before the first plank

Stack spacers at every wall and leave them there until the trim goes on. The gap is part of the system, not a mistake.

02

Undercut the jambs

Cut casings and jambs so the plank slides underneath, not butts against them. A flush-cut blade and a scrap plank as a depth gauge take ten minutes.

03

Keep the floor free

Never nail or screw a floating floor, and do not trap it under a cabinet. If a cabinet must sit on it, leave the gap and trim over it.

The questions people actually ask

Before you start cutting.

Can I just sand the peak down?

No. Laminate is a printed image under a clear wear layer. Sanding cuts through the pattern and leaves a dull patch far more obvious than the ridge. The plank has to be replaced.

Will it flatten on its own?

Sometimes, if a tight wall gap is the only problem. Cut the gap, wait a day, and watch it. If the ridge is still proud, the locking edge is crushed and the planks will not seat again.