

 Flooring.lol Editor
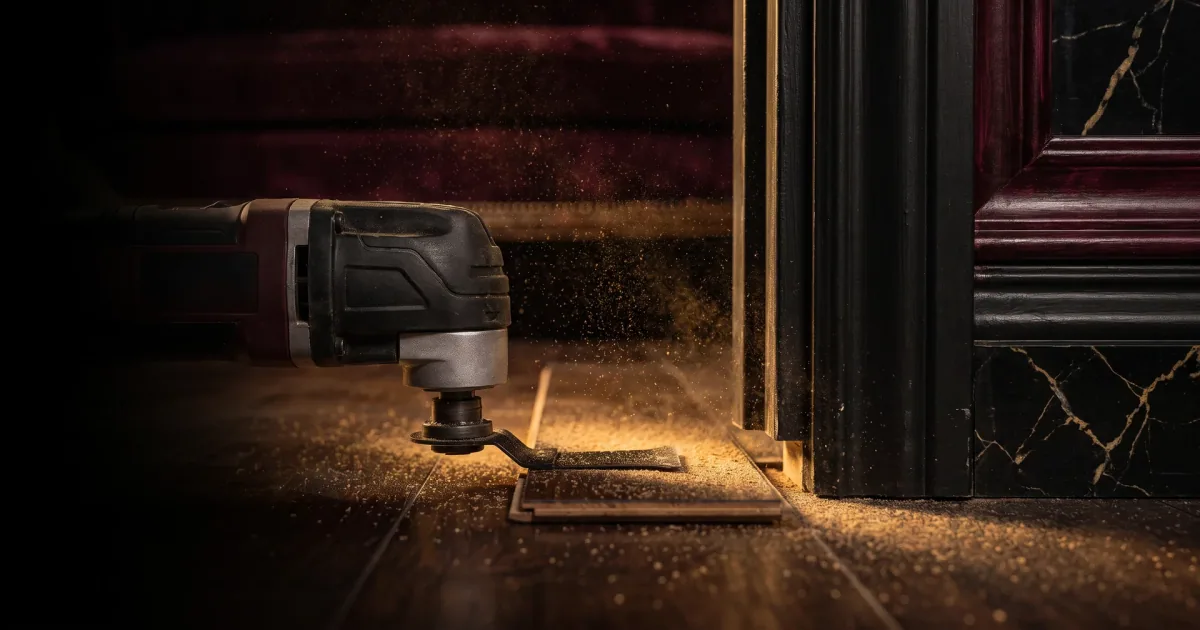
The door jamb is the tell. Walk into a room with a new floating floor and look at the doorway: if the planks butt into the jamb and somebody has run a bead of caulk over the joint, the rest of the room can be perfect and it still reads as a weekend job.
Jambs are awkward because they are fixed, they are in the way, and they sit exactly where the floor needs to move. The answer is not to fit the plank around the jamb. It is to cut the jamb so the plank slides underneath it.
With the right blade and depth, one side of a doorway takes about ten minutes. Here is the sequence, the tools and the two places it goes wrong.
Casing, jamb, and what you are actually cutting
The casing is the flat decorative board on the face of the wall. The jamb is the frame behind it that the door hinges on. At floor level they meet, and the casing usually sits a little proud of the jamb, which is why one cut is never quite enough.
A door frame is a U sitting on the floor: two legs and a head. The floor has to pass under both legs. On a finished doorway that can mean two jamb cuts and four casing cuts, because each leg has a casing on both faces of the wall.
This is where the expansion gap gets confusing. The plank runs under the jamb but still stops short of the wall by the gap your flooring asks for. Fill that gap at the jamb to make it tidy and you have pinned the floor exactly where it needs to move.
Undercut, do not notch
Notching means cutting a notch out of the end of the plank so it fits around the jamb leg. It is the quick version, and it is the one most of us try first, usually late in the day, usually with a utility knife.
The problems arrive later. A tight notch pins the floor; a loose one leaves a gap you can see from the doorway. Either way you have removed the locking edge where the plank meets a fixed object and left an open end where mops and pet bowls live.
Undercutting means cutting the bottom of the jamb so the plank slides underneath. The jamb becomes a small bridge over the cut end of the plank. You keep the full plank, the locking edge, and the expansion gap at the wall. The cut in the jamb is hidden by the floor and by the trim, which is the whole trick.
The common mistake is cutting the plank to fit around the jamb instead of cutting the jamb to fit the plank. The first takes five minutes and looks like it. The second takes ten and looks like the floor went in before the door frame did.
The three tools that actually work
An oscillating multi-tool with a flush-cut blade is the default for a couple of doorways. The blade sits flat and cuts flush with the floor, so you can work right down to the subfloor without gouging it. It is slow, loud and easy to control, and its blade is thin enough to slip under the casing.
A jamb saw is the fast option. The hand version is a small saw with a flat sole and a blade set low; the power version is a rental. It cuts straighter than a multi-tool across a run of doors, though in a finished room the body of the saw can foul the wall.
A hand flush-cut saw earns its place in the last inch of a corner, under a casing that sits tight to a wall, or wherever the multi-tool body will not fit. It is also the quiet, low-vibration choice on a plaster wall, which matters more than it sounds.
What does not work: a reciprocating saw with a flush-cut blade. It bounces, it grabs, and it tears the jamb instead of cutting it. A utility knife will score a laminate plank and then wander off your line. If you are buying rather than borrowing, the tool list covers what earns its space.
Set the depth with a scrap of your own floor
The depth gauge is the floor itself. Not a tape measure, not the thickness printed on the carton: an offcut of the actual plank sitting on a piece of the actual underlayment.
Set too low and the plank will not slide under. Set too high and the jamb sits on the new floor, a pinch waiting for the first humid week. There is a whole article about what that pinch does to a laminate seam, and it is not a cheap mistake.
Here is the sequence that works.
- Cut a 6 in offcut from the actual plank, not a spare from another room.
- Put the offcut on the subfloor at the jamb with a piece of the actual underlayment under it.
- Lay a pencil flat on top of the offcut and scribe a line around the jamb. The pencil body lifts the line a hair above plank height, which is the clearance you want.
- Cut to the line with the blade flat against the jamb, checking the height with the offcut as you go.
- If you are using a jamb saw, tape a piece of underlayment to the sole so the saw rides at plank height instead of subfloor height.
That fifth step is the one people skip. A jamb saw set on the bare floor cuts a lovely flush line that is exactly one underlayment too low.
The order of operations
Order matters more than speed here. Cutting the far side of a doorway after the near side is full of planks is how people end up on their knees with a multi-tool between their feet.
- Lay the floor up to the doorway and stop one row short. Leave the last plank long.
- Vacuum the area. A blade cutting through grit dulls fast and wanders.
- Tape the casing face and slide a strip of cardboard against the wall. Tape the door edge too, or take the door off its hinges.
- Score the paint line where the casing meets the wall with a utility knife, so the saw does not tear a sheet of paint off the plaster.
- Cut the casing first, then the jamb behind it. The casing stands proud, so you are cutting through it to reach the frame.
- Cut both legs of the doorway, on both faces of the wall, before any plank goes back in. The blade is shallower than the jamb is wide, so you meet in the middle.
- Vacuum the kerf and slide a scrap under the jamb. It should slide with a whisper, not a shove.
- Fit the last row so the plank runs under the jamb and stops short of the wall by the gap on the carton.
- Refit the trim so it covers the gap without filling it, and fit the transition strip in the doorway.
Step eight is where the job is won. The gap belongs at the wall, never at the jamb. Butt the plank to the wall instead and you have built a no-expansion-gap fail under a door.
Protect what you are not cutting
A flush-cut blade will find the drywall, usually in the last inch of a cut, usually with a small spray of paper and paint. Tape a strip of cardboard or a plasterboard offcut against the wall behind the jamb and let the blade hit that instead.
Wear eye protection and ear defenders. A multi-tool is louder than it looks and it throws hot dust. If you have a second person, give them the vacuum nozzle and let them follow the blade.
Protect the new floor too: a scrap of rosin paper under the body of the tool stops the shoe scratching the planks you just laid. A strip of painter’s tape on the jamb face does the same job for the part you are keeping.
Metal jambs, plaster walls, and other awkward ones
Steel door frames are hollow, thin and grabby. A multi-tool with a metal blade will get through, slowly, with sparks and a smell of hot paint. Stop if the frame is fire-rated or structural, because those are not yours to cut. If it is a steel frame in a house, get advice before you cut; a transition strip at the doorway is often the cheaper answer.
Plaster walls are brittle, and the vibration can crack the keys behind the lath. Score the joint, use a hand saw, go slowly, and expect to patch. Plaster is rarely plumb either, so the casing may need a filler or wider trim.
Solid hardwood jambs cut fine with a fresh blade and light pressure. Forcing the tool burns the blade and sends the cut off line.
A jamb with a threshold already fitted needs the threshold taped and a scrap of wood held against it. If the threshold is screwed through the flooring, deal with that first; it has its own article.
After the cut
Vacuum the kerf, then run a utility knife along the cut edge to shave off the fuzz. On an MDF jamb, seal the raw end with paint or a thin coat of wood glue, because the first wet mop will find exposed fibre.
Slide a coin into the gap at the wall before the trim goes back on. If it will not fit, the floor is tight, and you will be reading about peaking seams before the season changes.
Then fix the trim to the wall, not through the floor, and put the offcut you used as a depth gauge in the spare box. Next doorway, the gauge is already cut.